How to set up SPF?
Courses: Email Bounce
Create: 1962 days ago
Update: 1815 days ago
Reading time: 5 min
SPF is vitally important if you want to be able to send emails to recipients from your domain. To set up SPF, you will need to publish a TXT record on your DNS. The process is easier than it sounds, and you don't have to be a master coder to accomplish this task.
In this lesson, we'll walk you through the proper SPF syntax and some other important SPF rules, teach you how to create your own SPF record, and how to publish the SPF record on your website for email authentication.

SPF Syntax
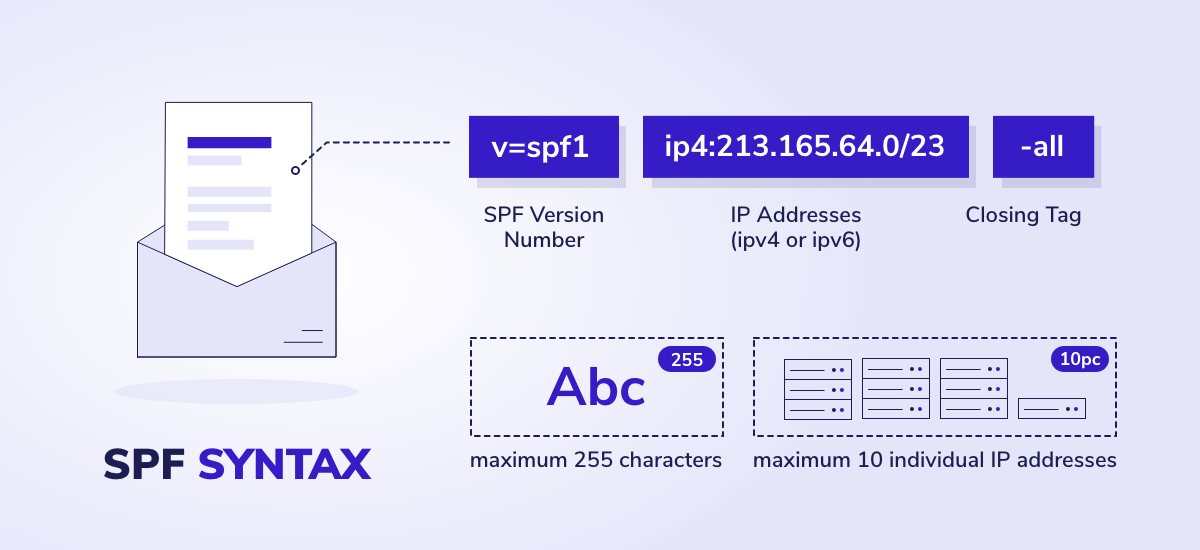
An SPF record is a short TXT file that has three basic components that you might think of as a beginning, middle, and end. Or, in this case:
- The SPF version number
- A list of IP addresses and hosts authorized to send email from your domain
- A closing tag
The proper SPF syntax must be followed exactly, otherwise recipient email servers will be unable to read it. If they cannot read your SPF file due to poor syntax, your emails will be undeliverable.
SPF Version Number
The SPF version number is the first thing you will type in the TXT file. Here is the proper syntax:
v=spf1
That's it. It means "SPF Version 1."
IP Addresses
For your list of authorized IP addresses, you include the type of IP address, followed by a colon (:), followed by the IP addresses. There should be no spaces in this command, so the syntax for an IPv4 address would be:
ip4:172.31.255.255
For an IPv6 address, the syntax would be:
ip6:2001:db8:3333:4444:CCCC:DDDD:EEEE:FFFF
Note that there are no spaces in these IP addresses. If you include multiple IP addresses in order to send from more than one, include a single space between each one.
If any third-party is authorized to send emails on your behalf, you should use an "include" instruction and that sender's website address, formatted like this:
include:anothersender.com
Closing Tag
The final command in your SPF is to include a space followed by an "all" instruction. The "all" can have various contexts, as follows:
- -all This is a "Fail" command which means that if an email is sent from any other IP address within your domain, it is unauthorized. The recipient's email provider will reject it.
- ~all This is a "Softfail" command which means, "Maybe I accidentally sent this from one of my own unauthorized IP addresses." The recipient email provider will accept it, but possibly mark it as suspect.
- +all This command would actually allow any server in the world to send emails from your IP address, so DO NOT use this as a closing command for your SPF record!
Additional SPF Rules
A proper SPF record is fairly short. You are only allowed to use a maximum of 255 characters, including spaces, in SPF record. Also note that you are limited to including up to ten (10) individual IP addresses for authorization, but no more than that.
How to Set up Your SPF Record Correctly
Now that you know the proper SPF syntax, here are the steps to properly set up your own SPF record:
- Gather the IP addresses email server that you wish to authorize to send emails out of, and open up a blank TXT file.
- Type the SPF version number in the TXT document: v=spf1
- Include a single space and then type in your authorized IP addresses. If you only have one IP address you plan to use, the TXT document should now read something like this: v=spf1 ip4:172.31.255.255
- If you plan to use a third-party sender, insert a single space and use an "include" tag next, such as: include:anothersender.com
- Insert another single space and include either the -all or ~all closing tag.
- Your completed SPF record should now look like something like this:
v=spf1 ip4:172.31.255.255 include:anothersender.org -all
Congrats! You have successfully completed your first SPF record. Save that file on your computer so that if you need to amend your SPF or make changes later, you've already done the hard part.
How to Publish SPF Record on Your Domain
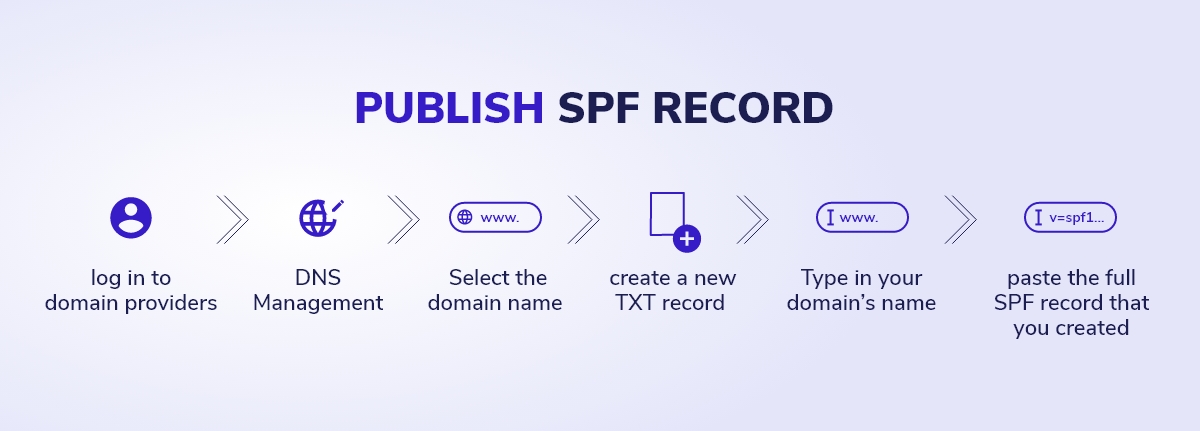
You've now created an SPF record with proper syntax. However, it doesn't do any good unless Gmail, Yahoo!, AOL, or another email provider can check it. The next step is to publish your SPF to your domain. Follow these steps:
- Go to your domain host provider's site and log in to your account.
- There should be a page where you can access your DNS records (labeled "DNS Management" or something similar).
- Select the domain name that you want to authorize for sending emails and open its DNS Manager link.
- Select the option to create a new TXT record on your domain.
- Type in your domain's name in the "Host" field.
- In the "TXT Value" field, copy-and-paste the full SPF record that you created. (Double check to make sure the syntax was not altered in any way.)
- The "Time to Live" field tells an email provider how often it should check back to verify these details. You can leave it on the Default setting, or set it to another time period in seconds (1800 = 30 minutes, 3600 = 60 minutes, and so on).
- Click "Save," "Finish," or whatever command your domain provider includes to finish the process.
Now that you have published your SPF record on your domain, email provider services are able to run an instant check to verify that you are the authorized sender of your messages. Well done! If you want to make sure that
you set up your SPF record correctly
 How to Test if SPF is Set up Correctly
There's an old saying that email marketing professionals often use: "Test it and then re-test it.
Read more »
, test it with different methods! If you don't set up your SPF record correctly, you can easily end up on a blacklist. Learn how you can
remove your IP from a blacklist
How to Test if SPF is Set up Correctly
There's an old saying that email marketing professionals often use: "Test it and then re-test it.
Read more »
, test it with different methods! If you don't set up your SPF record correctly, you can easily end up on a blacklist. Learn how you can
remove your IP from a blacklist
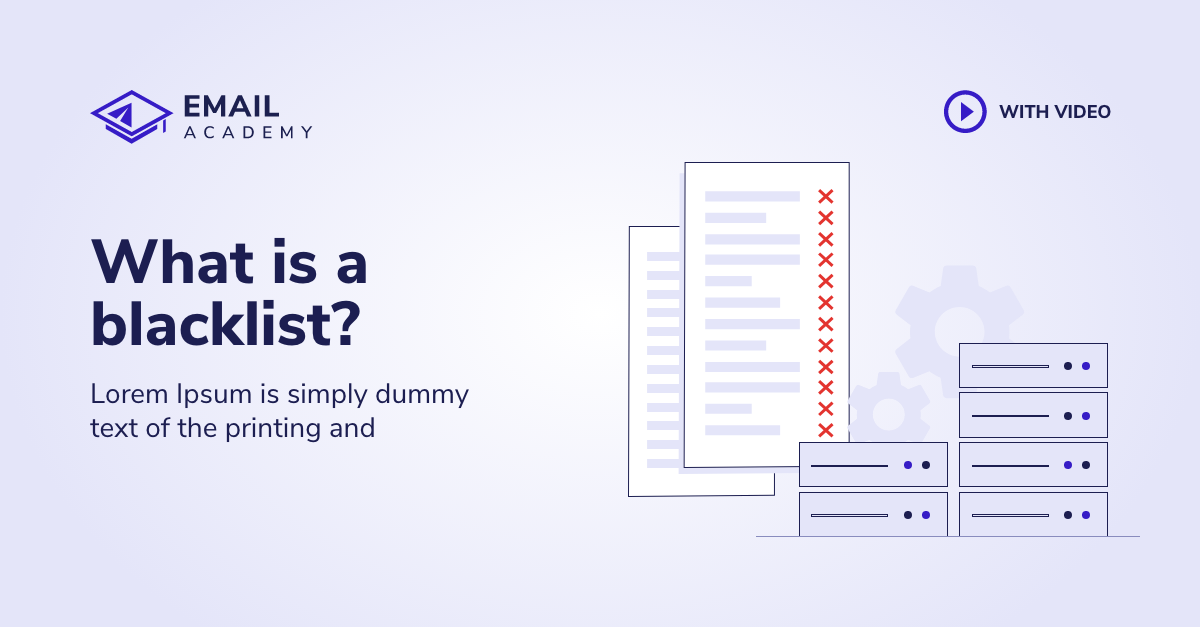
 How to Remove my IP From a Blacklist and Be Protected?
One minute, you’ve spent a great deal of time and effort on the next big email marketing campaign for your...
Read more »
.
How to Remove my IP From a Blacklist and Be Protected?
One minute, you’ve spent a great deal of time and effort on the next big email marketing campaign for your...
Read more »
.

Check your knowledge now!
Time: 2 min